
Page 61 - LIT-18626-12-56
P. 61
Care and storage
EJU41192 See the instructions included with the flush
Post-operation care
kit for proper installation.
EWJ00321
(1) Place the watercraft in a horizontal posi-
WARNING
tion.
Always turn the fuel cock knob to “OFF”
(2) Remove the hood. (See page 26 for hood
when storing the watercraft, otherwise
removal and installation procedures.)
fuel could leak out into the engine or en-
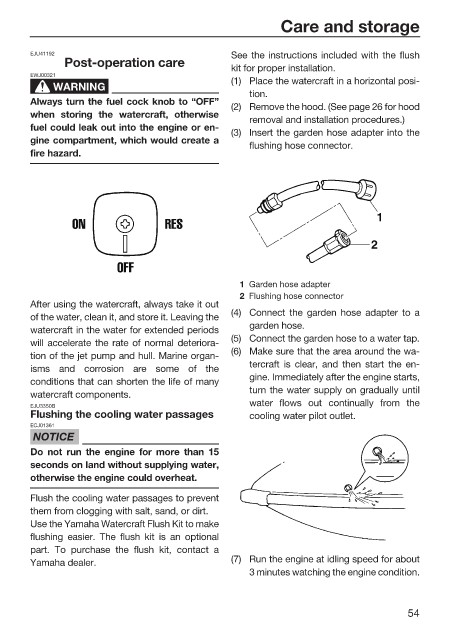
(3) Insert the garden hose adapter into the
gine compartment, which would create a
flushing hose connector.
fire hazard.
1 Garden hose adapter
2 Flushing hose connector
After using the watercraft, always take it out
(4) Connect the garden hose adapter to a
of the water, clean it, and store it. Leaving the
garden hose.
watercraft in the water for extended periods
(5) Connect the garden hose to a water tap.
will accelerate the rate of normal deteriora-
(6) Make sure that the area around the wa-
tion of the jet pump and hull. Marine organ-
tercraft is clear, and then start the en-
isms and corrosion are some of the
gine. Immediately after the engine starts,
conditions that can shorten the life of many
turn the water supply on gradually until
watercraft components.
water flows out continually from the
EJU3350B
Flushing the cooling water passages cooling water pilot outlet.
ECJ01361
NOTICE
Do not run the engine for more than 15
seconds on land without supplying water,
otherwise the engine could overheat.
Flush the cooling water passages to prevent
them from clogging with salt, sand, or dirt.
Use the Yamaha Watercraft Flush Kit to make
flushing easier. The flush kit is an optional
part. To purchase the flush kit, contact a
Yamaha dealer. (7) Run the engine at idling speed for about
3 minutes watching the engine condition.
54